 Sarasota Siding
 Fiber Cement Siding Built for Bee Ridge, Not Just Sarasota in General
Bee Ridge sits inland enough from the bay to avoid direct surf, but it is still squarely inside Sarasota County's wind, rain, and humidity envelope. Homes here take the same hurricane-force wind loads, the same relentless UV, and enough salt-laden air drifting off the Gulf and Sarasota Bay to matter over a 20-year siding life. A siding job that would hold up fine in a drier, cooler climate can fail here in ways that aren't obvious until the fifth or sixth summer — swollen seams, chalking paint, soft spots behind trim. We install James Hardie fiber cement siding on Bee Ridge homes because it's engineered for exactly this kind of climate, and we install it the way Hardie's own specifications call for, which is where most siding problems actually start.
This page covers what fiber cement siding needs to do in Bee Ridge specifically, what a correct installation actually involves, and how our process works from first look to final walk-through.
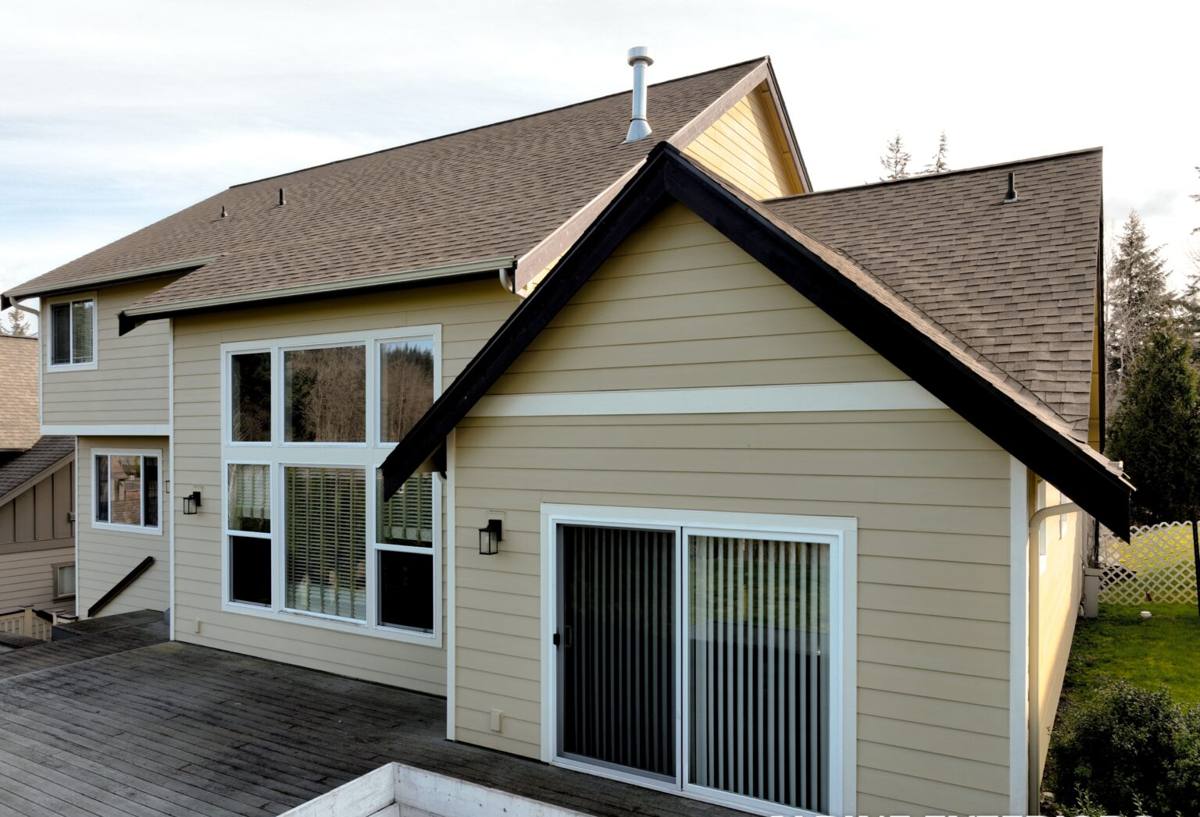
What Bee Ridge's Climate Actually Does to Siding
It helps to be specific about the stresses instead of just saying "Florida weather is tough." Four things do most of the damage over time:
- Hurricane-force wind: Sarasota County sits in a wind zone where siding has to resist both direct wind pressure and the suction that pulls panels away from the wall on the leeward side of a storm. Fastening pattern and panel engineering matter more here than in most of the country.
- Year-round UV: Sarasota gets strong, direct sun essentially twelve months a year. Paint film that isn't formulated for this kind of exposure fades, chalks, and loses adhesion faster than the manufacturer's warranty timeline assumes.
- Wind-driven rain: Tropical systems and summer storms don't just rain down — they drive water sideways into laps, seams, and trim joints. A siding system's ability to shed that water, rather than absorb or trap it, decides how long it lasts.
- Salt air: Bee Ridge isn't waterfront, but Sarasota Bay and the Gulf are close enough that salt-bearing humidity reaches inland neighborhoods regularly. Salt accelerates corrosion of fasteners and trim hardware and speeds up the breakdown of lower-quality coatings.
None of these individually is exotic — but stacked together, year after year, they separate siding that was installed correctly from siding that was installed fast.
Why We Only Install James Hardie Fiber Cement
We get asked fairly often about vinyl, LP SmartSide, and other fiber cement brands. We don't install any of them, and we think homeowners deserve the honest reason why, not just a sales pitch for what we do offer.
The Short Version
James Hardie fiber cement is non-combustible, engineered specifically for high-moisture, high-UV, coastal-adjacent climates through its HZ5 product line, and finished with a factory-applied ColorPlus coating that's baked on under controlled conditions rather than field-painted. That combination — the substrate, the climate engineering, and the finish — is what holds up in Bee Ridge conditions over decades, and it's backed by a strong transferable warranty when installed to spec.
What We're Not Saying
We're not telling you vinyl or engineered wood siding are junk. Vinyl is inexpensive and easy to install; engineered wood products have their place in drier climates. But vinyl can deform in extreme heat and doesn't offer the impact resistance fiber cement does in wind-driven debris events, and wood-based siding products carry moisture-management requirements that are harder to guarantee long-term in a climate this humid. We made a standard for our crews and our warranty, and Hardie is what we're willing to put our name behind on a Bee Ridge roofline.
What Correct Fiber Cement Installation Involves
Fiber cement siding is only as good as its installation. Most of the failures we get called out to inspect on older homes aren't product failures — they're installation shortcuts. A correct job includes:
Weather-Resistive Barrier and Flashing
A properly lapped weather-resistive barrier goes on before any siding, with flashing integrated at every window, door, and penetration so water is directed out and down, never trapped behind the panel. This is the layer nobody sees once the job is done, and it's the layer that matters most in wind-driven rain.
Clearances That Actually Get Followed
Hardie's install specs call for minimum clearances from grade, roofing, and horizontal surfaces like decks or patios, plus a gap at the bottom of the siding for drainage and ventilation. Skipping these clearances to save a little material or trim time is one of the most common shortcuts we see — and it's usually invisible until moisture damage shows up years later.
Fastening Pattern for Wind Zone
Fastener spacing and type are specified by Hardie based on local wind exposure, not a one-size-fits-all pattern. In a hurricane-prone wind zone like ours, using the correct fastener count and placement is what keeps panels attached during a storm rather than becoming airborne debris.
Sealed and Caulked Joints, Correctly
Butt joints, corners, and trim intersections need the right sealant, applied correctly, not just caulk squeezed into a gap. Done wrong, these joints become the entry point for the wind-driven rain that's common here.
| Install Element | What Correct Looks Like | What Goes Wrong If Skipped |
|---|---|---|
| Weather barrier | Continuous, properly lapped, integrated flashing | Water tracks behind siding, rots sheathing |
| Bottom clearance | Gap maintained above grade/hardscape per spec | Wicking moisture, swelling, paint failure |
| Fastener pattern | Matched to wind exposure zone | Panel blow-off in high wind events |
| Joint sealing | Correct sealant, proper joint prep | Water intrusion at seams over time |
| Finish | Factory-applied ColorPlus coating | Field paint fails faster under Sarasota UV |
Our Process for a Bee Ridge Siding Job
1. On-Site Assessment
We walk the exterior, check the current siding or substrate condition, look at drainage patterns around the foundation, and note anything — soffit gaps, window flashing issues, prior water damage — that needs addressing before new siding goes on. Siding over a moisture problem just hides it.
2. Product and Color Selection
We go through Hardie's HZ5 lines and ColorPlus color options with you, matched to what performs well in this climate and fits the look of the neighborhood. Bee Ridge has a mix of home styles, and we don't push a single look — we help you pick what suits the house.
3. Written Scope and Timeline
Before work starts you get a clear written scope: what's being removed, what substrate work (if any) is included, the installation spec being followed, and a realistic timeline that accounts for Florida's storm season scheduling risk.
4. Removal and Substrate Check
Old siding comes off and we inspect the sheathing underneath. Any soft or water-damaged sheathing gets flagged and addressed before new siding goes on — this isn't an upsell tactic, it's the difference between a 20-year job and a five-year job.
5. Installation to Spec
Weather barrier, flashing, clearances, fastening, and joint sealing are done to Hardie's published specifications for our wind zone, not shortcuts. This is the stage where most of this page's content actually gets applied on your walls.
6. Final Walk-Through
We walk the finished job with you, point out what was done at trim, corners, and penetrations, and answer questions before we consider the job complete.
Maintenance: What Bee Ridge Homeowners Actually Need to Do
One advantage of ColorPlus-finished Hardie siding is that it doesn't need repainting on the schedule a field-painted product does. Still, a few habits extend its life in this climate:
- Rinse the siding periodically to clear salt residue and organic buildup, especially after a stretch of dry, still weather that lets salt film accumulate.
- Keep gutters and downspouts clear so water is directed away from the wall line rather than sheeting down the siding face.
- Trim back landscaping so foliage isn't holding moisture against the siding or blocking airflow at the bottom clearance gap.
- After any major storm, do a visual check for loose trim, cracked caulk lines, or impact damage — catching it early is a lot cheaper than catching it after a second storm makes it worse.
- Avoid pressure-washing at high pressure directly into joints and seams; it can force water where it shouldn't go.
What Drives Cost on a Bee Ridge Siding Job
We won't quote a number without seeing the house, but the factors that move the price are consistent from job to job:
| Factor | Why It Matters |
|---|---|
| House size and wall complexity | More corners, gables, and dormers mean more cutting, trim work, and labor |
| Substrate condition | Water-damaged sheathing found during removal adds repair scope |
| Product line and profile | Lap width, texture, and trim details vary in material cost |
| Accessibility | Multi-story sections or tight lot access affect labor time |
| Existing siding type | Removal complexity differs between vinyl, wood, stucco, or old fiber cement |
Why a Crew That Already Works Bee Ridge Matters
Wind zone requirements, permitting expectations, and even common substrate issues vary by county and sometimes by neighborhood age within Sarasota County. A crew that's already done siding work in and around Bee Ridge isn't guessing at clearance requirements or fastening specs for our wind exposure — they know it going in. That familiarity shows up in fewer surprises mid-job and a finished product that's built for what this specific part of Sarasota actually throws at a house, not a generic national install standard.
If you're considering fiber cement siding for a Bee Ridge home, we're happy to take a look and walk you through what we'd recommend — no pressure, no obligation. Reach out using the form below to schedule a free estimate.